jemappelle.s

Powered by Blogger.
    • Home
    • Destinations
      • Bali
      • Sri Lanka
      • San Francisco
      • Gran Canaria
      • Sweden
      • New York
      • Italy
      • Paris
      • Guadeloupe
    • Food
      • Snacks
      • Main
      • Salads
      • Dessert
      • Smoothie Bowls
    • Other
      • Travel Tips
      • Bucketlist
    • Legal Notice
I have been so  many times in Paris, but there is still so much more to see. This trip we focused on a mixture between our favourite typical touristic sights and spots we had never been to before. 
If you really want to see some secret spots in any city you go to, you should put aside your lonely planet (although these are really good) and browse through tripadvisor and instagram. Especially the last one is really good to find less popular and extraordinary sights. 
All the below spots i found through instagram, so they are gaining a lot of fame recently. Better be fast, before they get overcrowded as well. 

Musée D'Orsay


This museum lies opposite the river at the same level as thee Jardin de Tuileries. It has it's own metro station, so if you don't want to walk, it's pretty easy to reach with the yellow big line. 
The main reason i wanted to visit the musuem is the restaurant behind the big clocktower. From here you have a fantastic view on Sacre Coeur (my mum's very favourite spot in the city) 
To access the restaurant, one actually has to pay entrance to the museum, which is 12€ per Person. I was getting quite upset, since a musuem visit was not on our plan and paying this much, just for a view and a probably more expensive drink in the restaurant, let me rethink the need of this visit. 
Anyhow we decided to pay, since we extra came, but very luckily the security guard had heard that we really only want to see the clock. So on our way to the cashier, he stopped us and muggled us in through the gift shop. So we actually got this museum visit for free, but as i have seen it now, it's also worth paying for. It reminded me very much of the MET in New York, although it is much smaller. Basically we only found the clock with the restaurant, but realised afterwards, that there are two, when we had a look from the outside. Nevertheless we could not find the other one, that has the better view. So take your time to explore all corners of this Musuem. 

Grande Mosquée de Paris


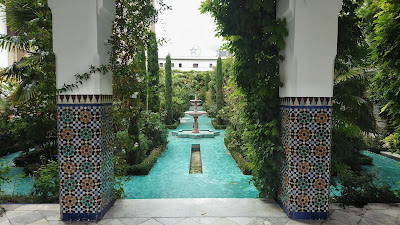
Being a real fan of arabian architecture, my biggest wish is to see Marrakesh one day. Nevertheless, this is not an option as a lonely blond woman for now. If you like the flamboyant decorations and arches, you should come to the mosque in paris, lying very close to the Institut du Monde Arabe. 
The Complex of the Mosque is quite big and featuring a small café in a beautiful garden, a huge garden inside the Mosque itself, a tower and several rooms for praying. If you visit, please check the praying hours before due to respect. 

Cloud Cakes


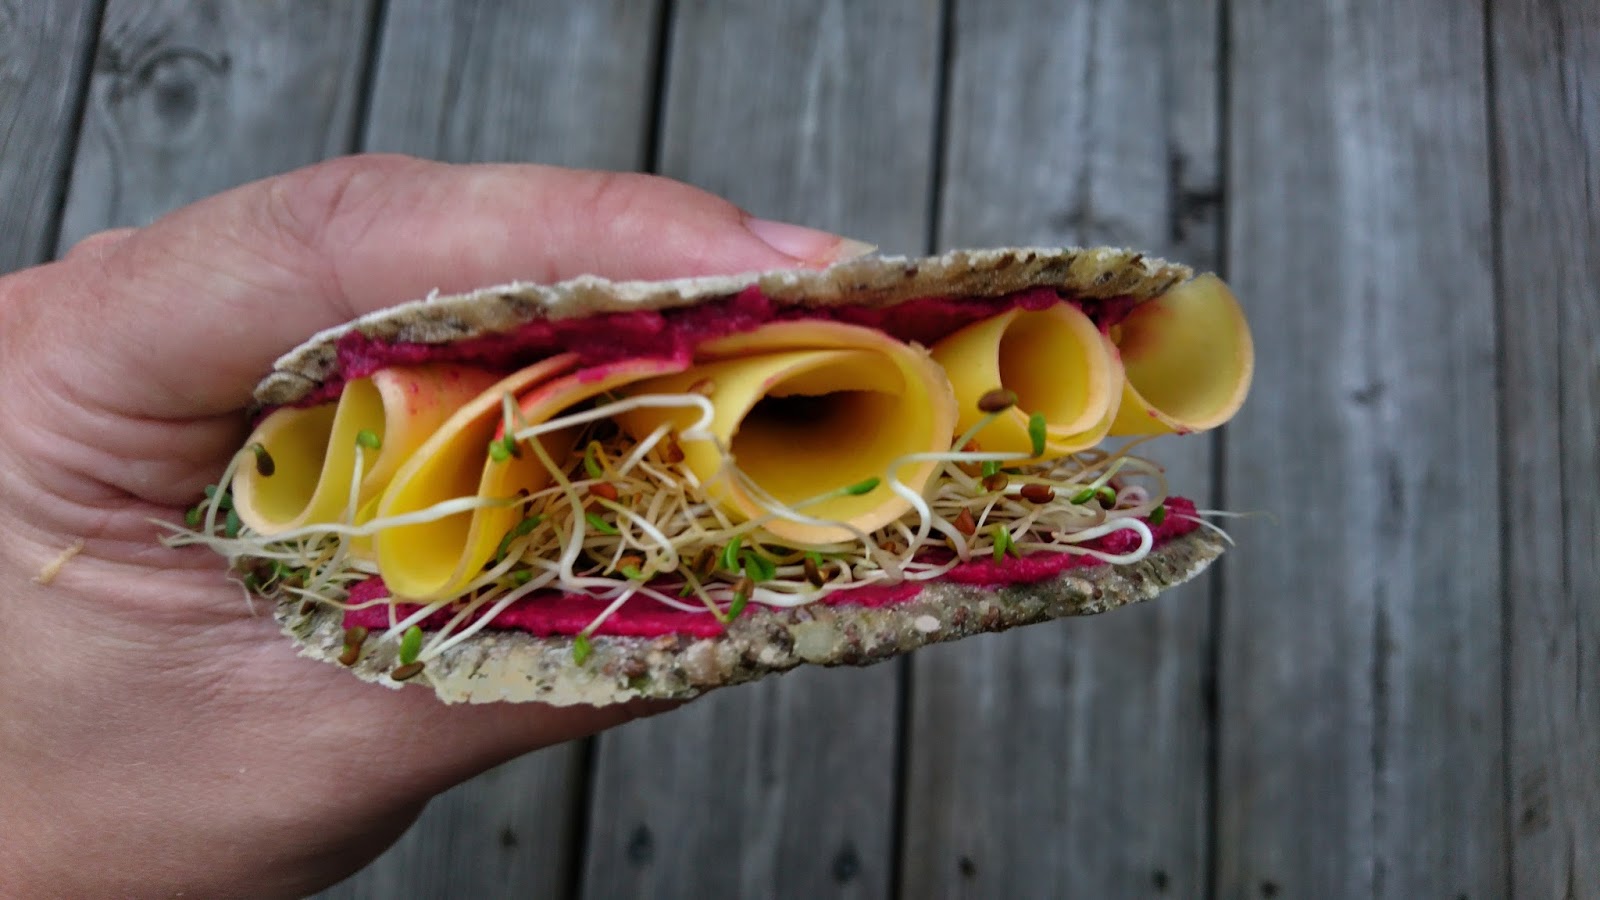
The french kitchen has so many pastries and sweets to offer, but unfortunately all of them contain milk or egg. To not miss out, i was desperate to find the best vegan bakery in town and found this cute little place, that offers a huge varation of cakes and even french croissants for breakfast. Forget about LaDuree, which is overrated and come here instead. To come here, take best the Metro to Etienne Marcel station and stroll along the main roads, that offer so many different culinary treats. 
I had a version of a Black Forest Cake and a Tiramisu Muffin, both so delicious, that i would have loved to try the whole menu. Unfortunately croissants were already out, since we came at lunch. So on my next trip to Paris, i will try my very first french croissant here. 

Galerie Lafayette Rooftop


There has always been a restaurant on top of Printemps, but this one has recently been closed for renovation. Another very good view, especially at night can be taken from the Rooftop of the very famous shopping Mall Galerie Lafayette. Half of the platform is though occupied by a bar, so the best view can only be enjoyed when sipping a fancy drink there, but otherwise you get a great glimpse of the Eiffeltower and the Opera for free.

Au vieux Paris


This tiny little hotel/restaurant is the oldest in Paris and lying very close to Notre Dame. The whole fassade is covered by leaves and the colourful furniture outside is placed on the sidewalk, with many little Trees and Plants. While eating typical french cuisine, for a moderate price, you can hear some little canary birds sing in the cage next to you. Also the restrooms are the smallest i have ever been to, guess at earlier times people weren't as big as nowadays.

Share
Tweet
Pin
Share
No Comments
Well i honestly can't say how very often i actually have been to Paris, but this is my very favorite city in the world. Even New York can't match with it. 
There is one word for each city and Paris word is definitely l'amour. 
There is something so captivating and beautiful about this city, that keeps me coming back again and again, falling in love allover each time. There are so many things to see in Paris, even after being there so often, i discover new spots each time. While all big cities grow and change really rapidly, Paris still has his old charming character. It is dirty yes, but that's just how you take it. 
I like Paris most because of it's architectal features, although i am not an expert. The streets of Paris just have their own character, high houses with these cute little balconies, pressed to each other along endless roads, all somehow ending at the Arc de Triomphe de l'étoile.
 I would say i inherited my love for this city from my mother, who has been even more often than me.
As a perfect birthday gift to us both, we decided to go back again to Paris after a long break, nevertheless the present fear of terror. 
Paris is nice in every season, but i would say that autumn is my very favourite. It is not too hot, still there is a leftover summer breeze and the city is far less crowded.

Budget: 350€ (Flights 100€, Hostel 150€, 100€ Food, Entrances, Transport)
Duration: 4 days (3 nights)
Travel Time: Middle of October


 Good to Know
How to get around:
Paris has several airports, but it is still very easy to get into town from each with public Transport. We landed in Charles de Gaulle, north of the City and took the RER to Gare du Nord. 
There is a very cheap deal called Pass Navigo, which is a weekly ticket for all public Transport in Paris. It includes all Zones, thence transport to and from the Airport and even further out to Versailles. 
This pass starts on Monday and ends on Sunday, so it is only a really good deal, if you come in the start or middle of the week. Otherwise seperate tickets might be cheaper. 
Regular Transport from Airport to the City costs 10€ each way. 
To buy a Pass Navigo you need to bring a passport size picture to stick onto your Card, which makes it only valid for you. The price for a week is 22,80€ adding a Fee of 5€ for loading the card first time. If you ever come back (which is for sure) you can just reload your card.
Where to stay:
I have stayed in many different places in Paris, but for young people i would definitly recommend St. Christopher's Inn Hostel at Gare du Nord. It is far the best starting point to visit the city, being very good connected to public transport. They offer private rooms as well, we had a 2 Bunk Bed Room with Private Bath. It is indeed small, but you explore the city all day (and night), so there is no need for a very fancy Hotel. If you book a private room, breakfast is also included, as well as an Aperol Drink at the Bar every night between 6-7pm. The Bar directly inside the Hostel has quite a negative touch as well, since the music is insanely loud and you better bring some earplugs, if you got a light sleep.
Culture:
French people are extremely polite, especially when living in Sweden, people are just SO nice! 
They do speak english, but if you make an effort to speak french, they will be even more friendly.
The french food is quite sweet, you will find patisseries everywhere and you will not get around trying Pain au Chocolat, Croissants, Eclairs, Macarons et Baguette naturellement!
Share
Tweet
Pin
Share
No Comments
Becoming Vegan did not let me forget the good taste of pulled pork or Bacon. The most unhealthy things one can possibly eat, yet i have to admit when someone fries Bacon Sunday mornings, my mouth is watering as well. 
Anyhow most important while being on a vegan diet is to take your time and research, to create a good alternative. This is so essential to stick to your decision and avoid cravings. Replace good food with something even better, that is healthy and proper tasty. The best example for this is Pulled Jackfruit. I had never heard of it until i came across some healthy vegan channels and literally i've been running around town for 2 weeks until i finally found it. In Europe you can mostly find Jackfruit canned, be careful not to take the one with sirup. A lot of asian shops offer it.


Level: EASY
What you need:
Time: 2h // Tools: Oven, Pot
280g Jackfruit (canned in Salt water/rinsed)
2 Tsp Maple Sirup
2 Cloves Garlic
1 Tsp BBQ Seasoning 
0,5dl Water
1 piece vegetable stew
1 Tsp Smoked Pepper Powder
2 Tsp Vegetable Oil
2Tsp Tomato Puree (Tube)
 

1. Rinse your Jackfruit and pull apart with your Hands and a Fork, put into a Bowl.
2. Dissolve your vegetable stew in cooking water and add into the Bowl.
3. Add all other ingredients to marinate the Jackfruit. Best press your Garlic fresh.
4. Let the mass rest overnight, so it soaks really up the spices.
5. Add into a cooking pot with 2dl water and cook for 30min
6. Heat up your oven to 170°c and bake in a form for around 1h until the texture gets a bit crispy. 

Serve with Avocado on homebaked Bagels.
Share
Tweet
Pin
Share
No Comments
I've been searching for a long time to find a satisfying Bagel recipe, ending up with my own, taking the best ingredients out of all. What i could see was, that in every recipe there was added sugar to the dough somehow, whether with honey, sugar or maple sirup. I don't like sweet bread and insisted on having my Bagels as sugarfree as possible. I avoid also using wheat flour, while for many recipes it is indeed neccessary to have some type of white flour. So below alternative Bagels are vegan, refined sugar and wheat-free.

Level: Middle
What you need:
Time: 3h // Tools: Oven, Pot, Bowl
9 Bagels
1 Package dry Yeast (14g)
3 dl warm Water
5 dl Spelt Flour
1,5 dl fullcorn Rye Flour
1,5 dl Buckwheat Flour
1/2 dl Chia Seeds
1/2 dl Flax Seeds
3/4 tsp Salt
Chia/Sunflower/Pumpkin/Flax Seeds for Topping

1. Fill a bowl with the warm water and add your dry Yeast. Let it rest for around 10min so it activates.
2. Meanwhile add your dry ingredients (except for the Topping Seeds) into a big Bowl and mix well.
3. Add your warm water and stirr and knead the dough, until it forms a sticky, but solid mass
4. Cover your Bowl with plastic foil and place it in a warm area. Let the dough rise for at least 1h, best is 2-3h.
5. Heat up Water with a bit of Salt in a big pot.
6. Take your dough and seperate into 9 Balls. Press them flat and add the hole in the middle.
7. When your water is cooking, add the Bagels one by one and cook until they come to the top.
8. Heat up your Oven to 200°c (fan)
9. Take your wet Bagels and place on a Baking sheet on a baking tray.
10. Decorate with Seed and bake in the Oven between 15-20min until they are gold-brown.
Share
Tweet
Pin
Share
No Comments
An apple a day keeps the doctor away. Apple Pie in the morning will remove all your sorrow from last evening. The problem with cakes is usually, that they are quite big. So either you share or you eat it all up on your own. If you know the struggle, here's this little cake, which is adapted to the single household.


Level: EASY
What you need:
Time: 45min // Tools: Small baking form 9cm
3cm Banana Slice
Sprinkle Lemon Juice
1 Tbsp Oats
1 Tbsp Spelt Flour
0,5dl Plant Milk
1 Tsp Sunflower Butter
1/2 Apple
A pinch of Baking Powder
Cinnamon


1. Mash your Banana with a fork and add your Lemon Juice&Milk
2. Slowly add your Oats, Flour, Baking Powder and Butter
3. Oil your Baking form and preheat the Oven to 150°c
4. Add your dough in the Form and cut your Apple in small slices. Fan up like a rose and top on your Pie. Sprinkl with Cinnamon and Lemon Juice
5. Bake in the oven for around 30min or until the Top turns Crispy. The consistence of the cake below will have a fluffy Oatmeal consistence. If you like it more firm, add more flour.
Share
Tweet
Pin
Share
No Comments
Very shortly before my upcoming Trip to Paris, i decided that i need to taste one typical french dish: Crêpes. My mother and brother do really love them. Since i am allergic to milk and egg, i have never had the delight to actually taste them before. Luckily i found a recipe by simplyconny, which i used as inspiration for my coffee-kicking crêpes.


Level: MIDDLE
What you need (4 Crêpes):
Time:45min // Tools: a good (!) Pan
2dl spelt flour
1dl freshly brewed dark coffee
1dl Oat Milk
1 Tsb Coconut Sugar
1 Tbsp Coconut Oil (melted)
1 Tsp Baking Powder


1. Add all dry ingredients in a Bowl and stirr well
2. Melt your coconut oil and add it with your Milk to the mixture. 
3. Stirr the dough well and let it rest for 5min, the texture will be liquid, so easy to pour in the pan.
4. Heat up your pan, with a bit of coconut oil. Test if it's hot by letting a drop of water in. When the water condenses, the pan has a good heat. 
5. Now pour your dough and spread quickly by moving the pan in circles, let bake on one side, until the edge turns crispy and turn over to the other side. 
6. Serve with Soy Joghurt and Frozen Berries. I topped the crêpes with homemade Almond Butter as well.
Share
Tweet
Pin
Share
No Comments
I've been to quite a few big cities in Europe and always thought nothing could ever match with Paris. When i finally came to Rome, this city took my breath. Mainly because of the atmosphere and the old buildings. I really love cities with characters. While New York was for me extremely modern and cold, Rome suprised me with it's ancient flair. There is so much to see, around almost any corner you will find something new and beautiful. Wether it is some ancient roman ruins or another church, this city will give you endless opportunities to explore.


How to get here:
You can get very cheap flights to Rome Fiumicino Airport, i paid 100euros both ways. From the airport there is a train that will take you within 45min to Roma Termini, the Central Station.

Where to stay:
I stayed at Alessandro Downtown Hostel, which is only a 5min walk from the Train Station. If you need to get to the airport or continue your journey, this is very practical.
I booked a bed in a 6-female dorm, which was very spacious, clean and luckily i shared it with only 1 girl the first night. The bathroom facilities are in the hallway, there are seperate shower and toilet cabins. It's less luxurious, but fairly cheap for staying in Rome. The price per night was around 31€ including city tax.


How to get around:
Walking: Although Rome is a quite big city, everything is fairly reachable, if you are young and like walking. Also you can see so much more and will maybe find some unique spots eventually, while getting lost in the maze of the city.
Public Transport: Rome has very good public transport connections, whether by Bus or Metro, everything is quite close. I have actually taken the Bus one day, since it was raining cats and dogs. I can not say anthing about the Metro though.
Hop-On Bus: If you visit Rome for the first time and like to access a lot of museums, i would recommend the Omnia City Pass, which also includes the tourist bus. Normally i always laugh about these tour busses, but on a hot day it is extremely nice to just get onto the Bus and enjoy the view from there.


What to do:
Fontana di Trevi: Well i guess you have heard of this one. The first time i visited this fountain was in the evening with a friend that i met/made in Rome. You will actually never find this spot empty, unless you come here at 6am, which i did the morning after. Even at that time, i was not alone. Traditionally you have to toss a coin into the fountain and make a wish. There are indeed specific rules, how to do it (with your right arm over your left shoulder, facing the fountain backwards).
Yearly around 1,3million Euros are taken out of the fountain by staff, donated to a welfare organisation.


Bocca della Vérita: Mostly known from the movie "Roman Holidays" with Audrey Hephburn, this huge marmor plate is yet another very touristic attraction. It is hanging on the wall of the Basilica Santa Maria. The ancient believe is, that the mouth will shut around your hand, if you speak out a lie. Indeed it is a very exciting thing to do. To access this sight, you need to donate a small amount to the church.


Spanish Steps: This set of steps between the Piazza di Spagna and Piazza Trinità dei Monti is a popular spot for many instagram bloggers and photoshoots. I went at 7am to see it empty, yet i was not the only one. There is a fountain at the Base of the Stairs and another Church at the Top. This spot is as all the other tourist sights kept very clean and nice compared to the rest of the city. You can easily reach the steps from Fontana die Trevi, which will take you 10min walk.


Vatican City: The state of Vatican is one of the busiest spots in the City and highly protected by military and police. If you like to visit, i would recommend you to buy a skip-the-line ticket with any operator. I booked a slot with Omnia before my visit, which saved me a lot of time. Otherwise you need to queue about 2h in the burning sun, to access the Basilica of St. Peter. The museums might not be as popular, and since they are huge, people flow in much faster.
In the vatican museum there are so many statues, paintings, carpets and much more, you could probably spent at least half a day here. Nevertheless the biggest reason i went, was the Sistene Chapel. The painted ceiling and the last judgment fresco by Michelangelo, which covers the altar wall are breathtaking. It is not permitted to take any kind of picture or video material in this room, therefore you have to go yourself to see it.


One more thing to do is climb the steps of the Basilica St. Peter. This is actually hard work and taking the elevator does not really make sense, since the hardest part to climb is the dome rooftop. In total it is 551steps you need to climb, you can skip 320 with the elevator. Being quite fit I still struggled, since it is really small alleys and you can get easily claustrophobic in the bad aired narrow towers. But after this torture, you will be rewarded with a fantastic view over the St. Peter Square and most of Rome.


Colosseum: Also known as Flavian Amphitheatre, this oval historical site lies in the center of Rome. It's built of concrete and sand and the largest Amphitheatre ever built. It could hold around 80.000 spectators for gladiatorial contests, animal fights and other public events. Nowadaways there is not much left and for me it was hard to imagine the ancient glory of this space.


Forum Romanum: Directly next to the Colosseum you will see the Forum Romanum and Palantine Hill. According to roman mythology the cave, where Romulus and Remus, the founders of the City where kept alive by the she-wolf Lupa was located here. The total area is incredibly big, i did not go inside, but from around you can see most parts of the ancient ruins.


Other famous spots to see are the Panteon, the Trajan's Market, The Piazza Vittorio Emanuele II, Trastevere (mainly for food) and so many more.

Where to eat:
Flower Burger (vegan): I have been waiting 2 days and 2 nights to finally go to this Place. Located very close to Vatican, this place makes Burger dreams come true. The variation of Burger Buns and patties is comparable to a rainbow. Sometimes they do special editions in pink and blue. While i was there, they offered an orange one. Even if you are not vegan, these burgers will more than satisfy you. My friend who is not a vegan is also still dreaming of her black charcoal burger.


Écru (vegan): This place is also a raw/vegan café that offers a huge variation of breakfast and lunch. Furthermore they have many veganized italian desserts, like tiramisu. In the café they sell a lot of organic products as well, far cheaper than in sweden. I went twice, since i fell in love with the sandwiches they do. I really would love to know how they make this round bread, it's far beyond delicious.


Dinner by the river: While my stay in rome, there were loads of tents built up on the river between Vatican and Trastevere, many offering like food trucks more individual treats and drinks. Me and my friend went to a place directly under Ponte Sant'Angelo, which was an incredible experience, since at night all the bridges are bathed in several spotlights.


Gelateria Della Palma (Via della Maddalena 19/23): This place has 150 (!!!) different flavours of icecream. Usually if there is such a big offer, a lot of sorts are quite similiar, just have another name. Not in this case. You can get any possible flavour in this icecream bar, weather fruit or candy, they got all of them. Furthermore they offer a broad range of Soy Icecream and most of the Fruit Sorts are without Milk.


Share
Tweet
Pin
Share
No Comments
Most about different Seasons i like the change of fruit and vegetables. Especially autumn has so many nice veggies to offer, i can hardly choose between mushrooms, chestnuts, so many types of pumpkins and roots. 
To finally start into the most colourful season in Sweden, i decided to start with an easy Pumpkin soup, since i have not yet made so great experience with chestnuts.


Level: EASY
What you need:
Time: 2h // Tools: Hand-Blender
1 kg Hokkaido Pumpkin
2x2cm slice Ginger
1 piece vegetable stew
400ml Coconut Milk Light
3dl water
(served with garlic-oil roasted spinach)


1. Wash your pumpkin and remove the top and bottom.
2. Cut your pumpkin including skin/seeds into squares
3. Add your pumpkin pieces andthe ginger with water and vegetable stew in a pot and cook until the pumpkin is soft and falls apart. Let cool down.
4. Use your handblender and blend all ingredients in the pot. Add on Coconut Milk and a pinch of Salt if neccessary.
5. Let the soup rest. It tastes best the next day, when all the ginger has settled. 
Share
Tweet
Pin
Share
No Comments
Pizza, Pasta and Positano, that's basically a very short summary of my time in Italy.
Two weeks are way too short, to discover the whole beauty of this country, but anyhow i saw probably as much as possible.
This trip has been 13 Days long (14 nights) and started and ended in (all roads lead to) Rome. 
Basically this has been my first backpacking experience, hopping from one place to another almost every day. Good planning and a lot of booking in advance (6 month) and some excel sheets made everything work pretty smooth. So below you can find the facts and a summary of the travel route.


Budget: 890€ (100€ Flights, 490€ Accomodation, 180€ Transport, 120€ Entrance Fees)
Duration: 13 Days (14Nights)
Travel Time: End of August (after school vacation)

Travel Route
(click below on each place for detailed info)
Salerno
Positano
Minori
Maiori
Amalfi
Ravello
Praiano
Sorrento
Capri
Naples
Pompeii
Rome
Share
Tweet
Pin
Share
No Comments
Inspired by the amazing bread at Écru in Rome, a raw vegan bistro, i decided to try my own raw bread, just hoping it would turn out nice, which it did.
As a perfect topping for any Sandwich, everyone recommends Beetroot Hummus. I am no fan of either of these two, but i had some leftovers and gave it a try anyway. 
The below Sandwich is also topped with avocado, homegrown sprouts and vegan mayo. Another seaonal nice topping is pumpkin carpaccio.
For all people who hate baking, this recipe is great, since you do not need to bake at all. Another plus:this bread is vegan and glutenfree and full of healthy power ingredients.


Level: EASY
What you need:
TIME: 30min // TOOLS: Blender, Bowl, 10cm diameter Cup, 1 Glass
BREAD (glutenfree, 10 pieces)
1dl Chia Seeds
2dl Buckwheat Flour
1 dl Sunflower Seeds
1 dl Pumpkin Seeds
1 Tsp Herbes de Provence
1 Tbsp Olive Oil
1 dl Water
Salt
BEETROOT HUMMUS:
1 Beetroot (cooked&baked)
150g Chickpeas (canned&rinsed)
1 Tsp Tahini 
Salt


BREAD
 1. Start with chopping your Sunflower & Pumpkin seeds into small bits with your Blender.
2. Put all DRY ingredients in a bowl and stirr well, before adding the Oil and Water.
3. Stirr the dough until it turns firm and can be kneaded by hand,without sticking to it (the chia seeds will soak in the water)
4. Spread a bit of buckwheat flour on a flat surface and roll out your dough with a help of a glass (if you do not have a rolling pin like me)
5. Roll out until it is 5mm thick and with your cup cut out round forms. 
6. Redo the process until you used up all dough 
7. Put your bread on a baking sheet and let dry for 2h in room, or 30min lowest temperature in the oven (turnover after half the time)
8. Store in a sealed box in the fridge for up to 7 days to keep moist and fresh
BEETROOT HUMMUS
This is really super easy, just put all above mentioned ingredients in a Blender, mix and spread on your bread afterwards. Enjoy! 
Share
Tweet
Pin
Share
No Comments
#wheninRome, me and my friend visited this fantastic Burger Place called Flower Burger, nearby Vatican City. Honestly their Burger Buns are amazing, coloured in black, pink and blue, one really wants to try all of them. Also they have a huge variation of Burger patties, all plantbased of course.
So to have an amazing throwback to that one time, i decided to make my own Rainbow Burgers.
Well, the buns are the trickiest party and especially it's hard to get them fluffy, if you do neither use egg nor milk. Also i learned, that using spelt flour as a more heathy alternative, always makes the dough a big more dry and hard. Anyway i got inspired by some typical american recipes, tried to veganize them and the first time i actually forgot the yeast. Imagine me, waiting for around 4h and nothing happened to the dough. I thought it might be to cold, so i still put them in the oven and got rewarded with some little rocks. I hate food waste, but these i needed to toss away. The second time it went definitly more smooth, while my patience was gone, i did not let the dough rest long enough, but in the end they were quite ok. So bring a lot of time, if you want to make fluffy Burger Buns.

Level: ADVANCED
What you need:
TIME: 4h // TOOLS: Blender, Bowl
BURGER BUNS 4PIECES
4dl Spelt Flour
1dl Soy Milk
1/4 dl neutral Oil
1 tsp Salt
1 Package dry active Yeast (14g)
Sesame
COLOURS
Blue: Blue Spirulina powder
Pink: Redbeet Juice
Orange: Kurkuma
QUINOA PATTIES (link)
VEGAN MAYONNAISE (link)

In total the preparation will take around 4h. So if you like the Burgers for lunch, better get up early. While most of the time the dough is resting, you can prepare the patties and other treats.
Start with blending all dry ingredients (flour, yeast, salt) in a bowl.
If you colour all your buns the same, you can already add your colouring now. Since i wanted all different, i coloured them afterwards (see below)
Slowly add Oil and Milk, start working the dough. Very important when using spelt flour is to not overdo it.
Now cover the bowl with a plastic wrap. While the dough is resting, it's important that no humity passes out the bowl. You will see small water drops start to develop, when the fermenting process starts.


Place the bowl close to the heating or in a warm place and wait for 2h. The dough should have approximately the double size now.
Now seperate the dough for your buns and form Balls. By now it is not possible anymore to add the colouring within the bun, because kneading the dough now will make it hard and dry.
Instead mix the blue spirulina with a bit of plant milk and paint your bun from the outside. The Kurkuma needs to be dissolved in oil to develop it's full colour. The redbeet juice is easiest to apply.
Let the now coloured Balls rest in small bowls (closed by plastic film) for another hour.
You will see they still grow.
Put the Balls on a Baking Sheet and tap them carefully in the middle, to achieve a bun shape.
Paint them one more time, before putting them in the preheated oven (150°c)
Bake for 10min and paint again. Now add your sesame seeds.
Bake another 10min until they are crispy from the outside.
Let them cool down and TASTE THE RAINBOW
(the blue and red bun almost taste like normal bread, while the orange really has a kurkuma hint)
Share
Tweet
Pin
Share
No Comments
This is a meatfree alternative for crispy Burger Patties. I am not a big fan of Quinoa, but anyway i bought it a while ago, because it is so healthy. This recipe helped me to like it a bit more.
Whether you form patties or small little meatballs, is up to you. While this mass is a bit lighter than my Blackbean Köttbullar, it is more a chicken alternative. 


Level: EASY
What you need (5 Patties):
TIME: 45min // TOOLS: Blender, Bowl
2dl Oats
1 dl Quinoa mixed (before cooking)
1 piece vegetable stock
1 Tsp Tomato Paste (Tube)
1 Tsp Mustard
1 Tsp Flax Seeds
2 tsp aquafaba (Chickpea Water)
2 tsp corn starch
1 Tsp neutral Oil
1 Tsp Onion Powder
1 Tsp Garlic Powder
Salt / Chili Pepper


Start with washing your Quinoa before cooking it. That removes a bit of the bitter taste. Cook your Quinoa with the vegetable stock, so it soaks in the spice. 
Now remove your water and add your cooked Quinoa in a blender. You will realise they actually soaked a lot of water, so to make the mass firm for our Patties, we need to add quite a lot of dry ingredients.
Start adding the oats, the flax seed and the starch. The flax seeds and starch are added to make the mass stick together, instead of an egg, as well as the chickpea water. Add all ingredients and blend until the mass forms a ball on its own. If your blender has a hard time, continue by hand.
Put the mass in the fridge for an hour, this will make it the perfect consistence for forming afterwards.
Form little Balls and then press them flat. If the mass does not stick to your fingers, it will neither in the pan. That means its perfect. If neccessary add more oats to get the texture.
Preheat your pan with a bit of oil and fry your patties from both sides until they are crispy. 
Serve in a Burger Bun or in any other dish.

Share
Tweet
Pin
Share
No Comments
Have you ever asked yourself, how the sweet potato fries in all places get so crispy? Everytime i tried to make some at home they just turned really soft in the oven. So obviously i thought they must be fried instead, which i absolutely not wanted to do. 
Nevertheless there are several tricks, which i have now collected, to make Sweet Potato Fries crispy in the oven, with a minimum of Oil. 
Anyhow the vegan mayonnaise i served it with, is kind of pure oil, making up for the non-fried fries.


 Level: EASY
What you need:
TIME: 2h // TOOLS: Blender
FRIES
1 Big Sweet Potato
3 Tsp Corn Starch
Smoked Pepper Powder
2 tsp neutral Oil
Salt
VEGAN MAYONNAISE
3 dl Rapeseed Oil
1 dl Soymilk
2 tsp white wine vinegar
2 Tbsp Aquafaba (Chickpea water)
Salt

FRIES
1. Peel your Sweet Potato and cut into approximately 1cm thick pieces.
2. Put them in a bowl of cold water for 1h in the fridge. This sounds super weird, but it helps the starch inside the potato to come out, which is important for the crispiness. 
3. Remove the water from the Bowl and add 2tsp of neutral Oil and the Corn Starch. Stirr well so the starch covers all fries. Now add your smoked pepper seasoning. DO NOT add Salt. This will be done before serving at the end. 
4. Now spread your fries on a baking sheet, leaving each single and seperate. 
5. Preheat your oven to 170°c and bake for around 30min or until crispy. My oven does not spread the heat equally, so i always have to check in between. 
While your fries are in the oven, you can prepare
VEGAN MAYONNAISE
Did you know that making mayonnaise is one of the most simple things ever. You need only a few ingredients and a blender.
1. Start with adding half of the Oil into a Blender with the Chickpea water and Soymilk. Add the vinegar and Salt as well.
2. Now blend until the mass turns slightly yellow and the oil is dissolved within the milk.
3. Add on the rest of the Oil and continue blending until creamy. If the Mayonnaise is too liquid, add more oil. 
Take out the Fries from the Oven and salt them slightly. Then dip into your Mayo and enjoy.
Share
Tweet
Pin
Share
No Comments
One of the most famous dishes here in Sweden are actually Köttbullar, small balls made of minced meat. Most of you might be familiar with them from shopping at IKEA, since swedish people also do eat other things, you will not find them all over the place (at least here in Stockholm)
I have never tasted original köttbullar, as they are always made with egg, which i am allergic to. Starting eating no meat, i came up with a vegan option, made of blackbeans. I tried several times and it is really hard to make them sticking together, but not ending up like dry little rocks.

Level: EASY
What you need (10 Balls):
TIME: 1h // TOOLS: Blender
230g Black Beans (canned&rinsed)
3Tbsp Oats
1 Tsp Onion Powder
1 Tsp Garlic Powder
1 Tsp smoked Paprika Powder
1 Tsp Mustard
1 Tsp Tomato Paste
1/2 Tsp Salt
1 Tsp Olive Oil
1 Tsp Flax Seeds


IMPORTANT: Only use canned beans, since old beans might not be soaked long enough. I use a package of ecological natural black beans 380g (230g when rinsed) and never experienced any problems. To be on the safe side, keep the rinsed water and add 1 Tbsp at the end, if your mass is too dry to stick together. 
Blend all your ingredients except for flax seeds in a Blender until it is a firm mass. If your blender strikes, continue blending with a spoon. Blend in the flax seeds and form little balls.
Heat Olive Oil in a pan until hot and fry your balls from all sides, until they turn crispy.
Preheat Oven to 130°c and bake for 40min. 
You can serve them in grilled Eggpant with Kale and top with Tomato and Cheese Sauce.
Share
Tweet
Pin
Share
No Comments
Maiori is rather a small spot i have to mention, because i actually spend a day here. This little town lies between Minori and Salerno, and is the big neighbour of the first. Nevertheless there is unfortunately not so much to see in this place, thence beaching is the main activity. 


How to get here: 
The SITA busses offer transport to Maiori, as well as boats from smaller companies. Fairly easy you can also stay a day with a car, just to check out the area. 

What to do:
Seintiere dei Limoni (see Minori) - i walked from Minori to Maiori, but of course you can also do it the other way around, which might be a completely different experience. 


Church of Santa Maria a Mare: If you have yet not visited enough churches, you can visit this one as well. While more impressive from the outside, due to its nice rooftop, the church is kind of random inside. Below you will find the view when walking over from Minori.


Shopping: While Minori is super small and has almost no shops, Maiori offers a nice promenade and many small local shops. If you do not like Italian food, or just want to try something different, there are some international places to eat here as well. 

Share
Tweet
Pin
Share
No Comments
Amalfi is the main town of the Coast and with Positano and Ravello one of the most popular spots to visit. Being rather small, it has still quite a few spots you do not want to miss out on.


How to get here:
Amalfi is also central spot for Bus traffic, since the SITA lines towards Salerno and Sorrento start and end here. Otherwise you can also get a Boat from any other destination.


What to do:
Amalfi cathedral: The main attraction in the city is the Cattedrale di Sant'Andrea, that is lying in the city center very close to the beach.
The church is dedicated to the Apostel Saint Andrews, whose relics are kept here. You can visit the Cathedral for free, but if you would like to see the Cloister of Paradise, which is directly built next to it, you need to pay a small fee. The visit includes a climb down in the tombs of the church, where noble people of Amalfi were buried.
A very popular thing is to have breakfast and a fresh latte on the steps of the cathedral, bought at one of the fancy cafés around the place.


Drink fresh Lemon Juice: The Amalfi Coast is known for all it's products made from lemon, wether it is liqueur, sorbetto or other treats, these lemons tastes different. The name of this sort is sfusato amalfitano, and the difference is in taste and size compared to our lemons in the supermarket. They can be double the size and taste much sweeter. I found a very good place, recommended by trip advisor, that serves a big bucket of fresh lemon slush for 6€. It's located in a small alley, lefthandside when you walk up the town from the cathedral.

Share
Tweet
Pin
Share
No Comments
Newer Posts
Older Posts

About


S//TRAVEL//VEGAN FOOD


Follow

  • Instagram

FEATURED

Paris is always a good idea

Well i honestly can't say how very often i actually have been to Paris, but this is my very favorite city in the world. Even New York c...

Labels

  • Accomodations
  • Bali
  • Dessert
  • Food
  • Gran Canaria
  • guadeloupe
  • Italy
  • Main
  • Money
  • New York
  • paris
  • Salads
  • san francisco
  • Smoothie Bowl
  • Snacks
  • Sweden
  • Travel Tips

recent posts

BeautyTemplates